.svg)

Explore live demos, WMS feature walkthroughs, optimization strategies, success stories, and expert tips to optimize your eCommerce and 3PL warehouse operations.
.webp)
Returns are a fact of eCommerce life, but they don't have to be complicated. In this video, ShipHero's VP of Product, Yosef Haas will walk you through how ShipHero's Warehouse Management Software (WMS) makes managing returns easy.
Hello everyone and welcome to another episode of ShipHero Future Walkthroughs. I'm joined today by Yosef, our ShipHero VP of Product. How are you? Good, how are you doing? Awesome, happy to have you here. So today Yosef will walk us through an interesting ShipHero feature: returns processing. Please take it away. 0:28 Thank you. So yeah, today we're gonna take a look at how you process returns in ShipHero. We're gonna focus on what happens when a return comes back into the warehouse. I'm not gonna look at how you create the returns. Returns can be created a number of ways in ShipHero including manually in the ShipHero admin, using our customer self-service returns API. We also have some integrations with companies like Loop Returns or internally. But we're gonna take a look at what happens after a return is created and you actually get the merchandise back in the warehouse. 1:00 So as you can see on my screen, I have the ShipHero returns section pulled up, and that's just under Returns > All Returns. It's showing me the returns that have been created. Now you can use this to search as well, so if you have a return that comes back, you can search by the RMA number that was assigned, the order number, or even the tracking number. To process the return, I'm going to click into the return detail. 1:31 You can see we have all the return information here. Starting from the top, you can see the details: when the return was created. You can view the actual return label if you need to, or you can void it. On the right side, you can see the actual information for the package: the tracking number, the cost of that label, and the weight and dimensions as well. 1:57 Below that is the actual item on the return. So in this case, just one item, and it tells us how many we're expecting. So we're expecting the customer to send one back. We haven't received any, so previously received is zero. And then I could put in how many I received now. The receipt quantity is just for recording purposes. That's not going to change what is actually returned, but if you want to record that you actually got the return, you can record that there. So I'll put a one there. And then looking after restocked, that's how I would actually put the inventory back into my ShipHero inventory. Now if it's damaged or you're not reselling the product, you just leave that at zero and restock won't have any effect if you are adding something back into inventory. So I'll put a one there. 2:42 You can also tell us where you want to put that. Now we'll show you the bins associated with that product. In this case, there's just one bin that has that product, but if there were multiple bins with that product, we would list them all there. You could choose. We can search for any bin. One common thing we see is customers having specific bins for returns. So in this case, let's say I have my return bin, start typing and click on that result. And I could use that to stage the return. So this example, that return's bin is a non-sellable bin. So before I'm able to inspect it to make sure that I want to resell it, I put it in that non-sellable bin, and if it is good to resell, I would then transfer it from the non-sellable bin to one of my bins on my shelf. 3:27 So I set up my return, I put in how many came back, and then I could save that. Now one note on status: we have these statuses here, so pending, warehouse complete, and complete. Those are just to manage your return process. Some things we see customers do is have warehouse get the return inspected and check it back, check it in, and then set it to warehouse complete. And that might tell someone in the office, for example, that they need to look at that and maybe issue a refund, for example. So you can create your own return statuses if you have a different workflow, but these are the three default ones that we have. So in this case, you can see I put it to warehouse complete, saved it, and it's updated that return, that inventory has now gone to my return bin. You can see those previously received and previously restocked are now updated because I saved that return. 4:20 Going down the page a little bit, you can see I have a section for attachments. That's great if you want to take a picture of the item if somebody's damaged, you want to record that and take that picture and attach it to the return so you can reference it later. 4:33 Below that is a section for refund. So the refund itself, if it's a Shopify order, we can't actually trigger that refund directly in Shopify. Shopify does have the ability to actually tell us what the return should be taking into account things like taxes. So there is a calculated Shopify refund button, and that will use Shopify's API to calculate what the refund should be based on what was returned. Otherwise, you can enter in this information here to get a total refund. So once you have your total refund amount, you can hit refund and we'll issue that refund through Shopify. If it's not a Shopify order or you issue the refund outside of ShipHero, you just hit mark as complete and that'll mark the return as complete. 5:51 For that, we do have a history, so anything that happened on the return when it was returned, when it was generated, will be logged in the history. 6:00 One other thing to look at would be an exchange. An exchange is something that if you're creating the return within ShipHero, you can actually create an exchange order at the same time. So if you have done that, you'll see on the return detail page you have a section for exchanges. So you can see this return had an exchange associated with it, and at this point, I can release the exchange, which would then allow that exchange order to go out. So by default, when you create an exchange, that's on hold essentially and won't go out until you release it. So once that return comes back, you can release the exchange and that will allow that exchange order to go out. The rest of the process is the same; there's no refund. You can just skip that section. But in terms of actually bringing the inventory back in, that's the same as we saw before. And that's it. That's a quick overview of the return process in ShipHero. Hope you learned something. Thank you very much, Yosef. That was very insightful. 6:58 And if you'd like to check out other feature walkthroughs, click on the top right corner. And if you're ready to unlock your eCommerce fulfillment superpowers, visit shiphero.com to schedule a call with us. Thank you for watching and have a great day.
.svg)
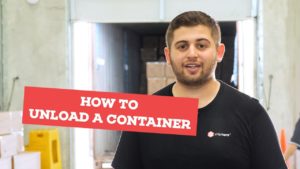
Unloading a shipping container isn’t quite as easy as unpacking your trunk. Watch this video of Alex with ShipHero and Black Wolf Nation Skin Care to find out how you can be more efficient unloading containers at your warehouse.
So, today is a really exciting day. We finally got the first shipment of our brand new product. We launched it on Friday, and sales are crazy. So this is just in time inventory at its finest. We're unloading the container. And today we're also going to be immediately shipping the orders that came in over the weekend. My name is Alex Lewkowict.
I'm the co-founder and COO of Black Wolf Nation.com, a leading men's skincare brand. Our warehouse for Black Wolf has expanded to a 3PL and we fulfill for other top eCommerce brands. Excitingly, our warehouse has since joined the ShipHero network. Today we're doing a live unload. So the truck came this morning, and from the moment that we cut the bolt on the truck, we have 2 hours to unload it.
If the container comes palletized, it's exactly like unloading a semi truck. But today, and like most of our containers, this is called floor loaded. There's no pallets. Every box is stacked on the floor. So these have to be hand unloaded hand palletized, received and put into inventory. And we only have a very short time to do it. So the most basic tool that you need are pallets, pallet jack and a couple of guys.
You can load a container with just that. But it takes a long time. So it pays to get some better equipment to help out with the process. Today, we're going to show you kind of an evolution of how we can do it with very little equipment until we have the full suite of equipment. First step when you get a container is cutting the bolt.
Once you cut it, we're going to open the container doors and then back it up to the dock so that we don't have the doors obstructing. And regardless of method of unloading, the first few pallets, the first few feet of the container, it's most efficient to just build the pallets right on the dock because you're so close to the goods.
Once you get further into the container, that's where you can really build efficiency as you get space in the container enough to turn a pallet around. You're going to want to build the pallets in the container right next to the wall of product, wrap it and then pull it off with a pallet jack. A forklift makes it a lot easier to unload.
What you do with the forklift is you build the pallet inside, turn it around in the container, drop it on the edge, and then you can have your forklift operator pick it off the container. So the other way to get goods from the back of the container to the dock is with the conveyor belt. Most containers that come are 40 feet long.
So bringing goods by hand, 40 feet takes a lot of time. So if you don't have a forklift, you're not ready for one. A good investment if you're going to get a couple of containers a month is a conveyor belt. We use just a simple gravity expandable conveyor belt. So as we get further and further into the truck, we stretch it out.
So you're going to have one or two guys in the container putting cases on the belt, and then you'll have your dock guys taking the goods off the edge of the conveyor and palletizing it. That way you eliminate all the walking, which is what tires the guys out and takes a lot of time. The last way to unload a container is if you have the next level up of equipment. Some warehouses will have motorized conveyors that expand into the truck as you get further and further down And then some of our other warehouses, like our warehouse in Jacksonville, have specialized forklifts that can actually unload floor loaded containers with slip sheets, which is basically a thin piece of cardboard that the factory puts under the goods. Doesn't take up a lot of space. And it's a special attachment on the forklift where the forklift can drive in pick up a pallets worth of goods and drive it out.
You can unload a container in 15, 20 minutes that way. The most important thing to consider with a live unload is the time limit. If you go over your time limit, whether it's an hour or 2 hours, you get charged penalties that can be quite expensive. So it's better to hire extra people to help unload the container than incur an extra hour of time.
Planning is key. Make sure that you communicate with the delivery company and you have a set delivery appointment and make sure that you have guys on hand with proper footwear, pallets ready, wrap ready, and that you're ready to go. When that container door opens, the clock starts and that's action time and you got to get it done.
.jpg)
In this video, our VP of Product, Yosef Haas, shares how Lot & Expiration tracking works in ShipHero. Everything from receiving Lots into bins, setting expirations, optimizing for FEFO (First Expired First Out) or FIFO (First In First Out) and how this can be used for products ranging from medical supplies, perishables and other items needing to be tracking in lots.
How to Use Lots and Expiration Tracking
So the lot tracking kind of starts with receiving. So when you receive product in, you can record which lot it's associated with. And so what I have here is receiving page and you can see I have one product on this purchase order 10 have been ordered. I've already accepted five. And what I'm going to do is accept or receive in some of the other quantity. So when I click on it, you can see I've already have two different lot codes that are associated with this product. These are have been previously created. So I can either choose to receive in one of the existing ones. So if the product and receiving is already part of lot one, I can just click on that and put in a quantity or I can actually add a new lot. So this was a new lot that I hadn’t received before, I just click add lot. And let’s say It's called Lot Three. I can put that there if the lot code has a barcode on it, that scannable code, you can scan that right here and it’ll input it and then I can choose the expiration date for that product. Again, so we can do that first expired first out. And so I'll choose the expiration date and the location I’m receiving it to. So this is one of those areas where if I already received some of this product under a different lot code into that location, if I try to receive it again into that location with a different lot code, I would get an error, notifying me that I can't, and then I can just change the lot that I’m receiving it to. So in this case, let's say I want to receive two of them into the receiving location. Let's save and here you’ll see only one lot SKU is allowed per location, so I can just click on the location and I'll just choose one the other locations, select that and save it. So now I've received two of this product into a location with the lot associated with it. So I'll just search for that product called Chips. If you can see all the different locations that product is in as well as the lot associated with it. So here you can see the one I just received a moment ago that was location A3 lot code was 3, it shows an expiration date. It shows me how many days until it’s expired. So now if you want to manually just keep track of that, you can see that we also have these filters here. So you can see I want to know, okay, which one? All the products in the warehouse that expire within 30 days. I can click on that and I'll go through all those products. There's also an email you can set up so that if your product is expiring within a certain number of days, you can get an email telling you which ones are expiring. Yeah, so there is a setting. First of all, I can disable picking if I don't want to pick product that's that's expiring within a certain number of days, I can put that. And you’ll notice we also have FEFO or FIFO. So first expired first out or first in first out. FIFO will be based on when you received it and FEFO will be based on the expiration date. So the allocation doesn't change. All these settings are more from when you go to pick the order. So as long as threre’s inventory, it will be allocated and then when you create a batch or go to pick an order at that point. ShipHero will determine where to pick it from. Now, again, based on the priority rules from the product detail page. If you go to edit, there's a checkbox down here. If you're if your product doesn’t need it, just leave that off. When you actually do pack the pack the order and ship it, it will prompt you to verify that the lot that you're packing is the one that we expect, the one that we told you to pack. So there will basically be a prompt in the UI asking you to confirm. So the picker is just telling you where to go. There isn’t a separate verification of the lot. But this is just to verify it. So this is during the packing phase to verify it. And then of course does get recorded with the order so that if you do need to look up which lot was shipped with an order or look up all the customers that got a specific lot, the shipping reports do have a column for that CDC load lot shipped with that order and then there is a filter as well. So if there's a recall, you need to find that all the customers that receive this specific lot, you can actually go to the shipment report, put in that lot code and then find all those orders very quickly.
Yosef talks about a feature available for ShipHero WMS customers who want to manage custom workflows. Workflows are designed to help manage and order processes in the warehouse. We cover the options, how workflows can be setup with automation rules and how to run better processes in the warehouse.
How to Create Custom Workflows in ShipHero
How to Use Automation Rules in ShipHero
Workflows, like to set up custom workflows that can help for things, for example, like embroidery, gift wrapping or anything that requires something different than the typical package of flow. So, for example, if there’s embroideries, after you take the orders, you’ll be directed to bring those totes to a workstation where embroidery is done. You can set up multiple steps.
We’ll go through all that during the demo, but basically, as you set up that workflow to guide those products from picking through the shipping process, I’m on the to setting screen within the endeavor. Within it should be that and we have this new workflow section that allows you to set up and define your workflows. So I have defined a pretty basic workflow.
Give it a name, this case embroidery, and then I define which stations will be involved in this workflow. And that’s where you’re really setting up where these tools have to go in the workflow. So after I’m picked, after I’m picking those, those orders is going to tell me to go to that first station. And you see we have this edge start button if there’s multiple steps in this workflow.
Now when you define the stations, you can define more than one station that can support this workflow. So if you have five embroidery stations, you can add at all five of those stations to the workflow, and many of them can be used within this workflow. This case I just had that one defined. So after I think it’s going to tell me, bring those orders to the station so they can be worked on.
Then instructions again, very creative, do the embroidery. So after I’ve defined the workflow, the next thing I need to do is set up a rule to associate products with the workflow. Now, just to kind of tie things together, the way we typically work is on your store. That’s if, for example, Shopify store, you’ll have options that the customer can put in.
So and there are many apps out there that support that. So if you add to your product page the ability to import a name, let’s say maybe a color, other custom options, those would then be pulled into ShipHero. And then we wanted to find a way to know that those products need to go through this workflow. So we have within the automation rules for that here.
And you can see what I did is I added a product tag to my products. So I added products, I is called embroidery. And for any order that comes in with a product that has that tag, I’m going to set the workflow to the embroidery workflow. And again, this, this embroidery, that’s just the name I give the workflow when I set up the workflow.
Now, you know, you have multiple products in an order and there could be multiple workflows assigned to one individual order. So in other words, if you have an embroidery workflow and a screen printing workflow or a gift wrapping workflow, that one order can be can be directed to go through each each workflow in sequence. So it will take the order to the border, read machines, and after it’s done, it’ll be they’ll be directed to now bring those orders to gift wrapping or keep them to screen printing for the items need screen printing.
Once you’re done through all the workflows, it would then go to the shipping stations. So that’s how you define which orders, which products need to go through those workflows. Once that’s done well, then move over to the iPad where you can see how that works within the actual batch. So one thing to note is that this is for batch picking normally.
So in order to move products through workflow, they have to pick through multi and batch packing. So as you can see on my iPad, once workflow is enabled on your account, this is new option here when you’re creating a batch. So I’m just creating a multi item batch that hasn’t changed. I choose the number of totes and I choose the workflow that I want to go through.
So I decided to be no workflow needed. That’s just for your regular orders. But what do you do? Want to take a batch of orders that need to go through the workflows. You just choose which workflow you want to want that. And if there is a case where a product or an order is in multiple workflows, choose any of those workflows, work with those orders.
So I pick my batch and my two items, I some hoodies, and I’ll just simply pick them as as you normally would. And now I’m done. So now you can see something that’s new. After I’m done picking my my batch, since this is a workflow, it’s telling me to scan any station to complete. Now it’s good. And then give me a choice of stations.
That’s those stations that I designed when I set up the workflow and set the stops. So what I have to do is scan a barcode that has that weird station name. So I have one set up and I’ll just scan it. Once I scan, I’m done. Actually, I completed my batch, then will move over now to the computer again, a very familiar screen where I’ll scan the tote that I picked those orders into and it expanded to it.
This is where it’s a little different. So typically you would see the shipping screen. Since this needs to go through a workflow, it tells me that I need to now do this customization through the do the embroidery. Now, if I had scanned a tote at the wrong station, since I am associated with that station, the first station, if I scanned this tote at a different station or if I skipped ahead to the shipping station, it would alert me, would tell me that I do need to bring this tote to that first station.
So continuing the process, I would just scan the product or click on it. And here you can see the instructions, do the embroidery. And we did pull in from the order. It was custom option. So I have my name. ShipHero and the color red. And those were put in by the customer when the order was placed. We put those in as custom attributes, so the person doing the embroidery knows what they need to do.
So now I do the embroidery. Once I’m done it market is done. And you know, if there are multiple products that go through each one, I then click on customization completed and now it’s telling me to bring those items to that tote. So I’m basically checking them back into the tote so we know where they are. Since there is only one stop that is workflow, the next one is going to the shipping station.
So if there was another stop, So if this was now going to screen printing for other products or gift wrapping or any other workflow that you needed, it would tell me where to bring it. In this case, again, there’s nothing else to do. So I bring it to the shipping station. At the shipping station that would look like any other order and I would ship it out.

Follow Aaron through our PA warehouse as he explains what replenishment is and the tools you need to do it better and faster.
Hello, I’m Aaron Rubin, CEO of ShipHero. I’m at one of our owned facilities and I want to explain what replenishment is and what your typical process will be of doing it. So if you look out here, you’ll see a typical picking area where you have lots of small boxes, each of which have different products, which is the ideal way to pick.
But if you look on this side. You’ll see we have pallets which have many, many boxes of the exact same product. Now, why don’t you just pick from a pallet? And it’s like if you replace each of those little boxes with the pallet it originally came on. There would not be enough room in the warehouse and you would also end up walking for mile because would just take up so much more space.
So when stock comes in, oftentimes you get a pallet worth of the goods, you need to store that pallet. But then you only want to be able to pick out of a single box of it.
So replenishment is the process of moving one or a few boxes out of a pallet and putting it into the pickable area.
If you have a really fast mover where you’re picking from the pallet, you still end up replenishing because what often happens is…With a SKU, with that velocity, you have a full container of a SKU. So, you’ll have 24 pallets, let’s say, of the single SKU. So you still need to keep most of it up in the air and on racks. And then one pallet at a time to be pickable. So you replenish that.
So, in our software it tells you what products need to be replenished. So, I’m not going to go into too much detail on that, but I’ll show you the physical process of how we do it.
When you’re replenishing from your pallet positions, if it’s on the floor loaded position.
It’s pretty easy to just grab a box. If it’s higher up, you can do things like a rolling ladder, but typically what you’re doing is you’re grabbing a forklift, pulling down a full pallet, taking out the box or two that you need.
Then, putting the pallet back up into that original position.
An ePicker makes it a lot easier where you can go up, remove the box or two that you need, drive it to where it needs to go without having to pull the full pallet down and put it back.
So, it’ll take about half the time. And ePickers are generally cheaper and easier to operate than a forklift. So if you have the need to do a lot of replenishment, making an investment in an ePicker will often be a smart idea.
ShipHero is upgrading the users page and introducing more advanced user permissions. The new Users & Roles page gives you the option to assign predefined “roles” to each user to grant them specific permissions.
Danno (00:06): Hello everyone and welcome to another episode of ShipHero Feature Walkthroughs. I'm joined today by Val, our associate product manager. How are you today Val? Val (00:14): Hello, I'm good. How are you, Danno? Danno (00:17): I'm good, thanks for asking. So today, Val will walk us through the ShipHero user roles and permissions. Is that correct? Val (00:25): That is correct. All right. So we're going to look at a very, very important feature, which is being able to create users, edit existing users, deactivate users that you no longer need, as well as assign those users to a role and the role will have specific permissions. So depending on the role that user is assigned will determine what parts of the application they can access. So while this is a simple feature, it is quite essential for pretty much any ShipHero user. So let's take a look first on how to access this page. So most people will star kind of in what we call app dot, this page here where you have your orders. When you go to my account, you'll see an option for users, also one for roles and permissions. If you click either of these, they'll forward you to the same user screen so you can just kind of select which one and it will forward you there. (01:27): All right, and this is going to be your users enroll page. You'll see there's two tabs up here. One will be your users, where you'll see all of your existing users both active and inactive. On the top right, you'll see your total active users here. And then if you just go one tab over, you'll see all of your roles. If you selected the roles from under my account, it would just forward you straight to this page, but you would easily be able to go back and forth between the two. From the roles page, you'll see all of your existing roles, active, inactive ones, and you'll be able to create new roles that edit existing roles from here. One other thing to note is you can access these pages from this, we call it the shipping dot ShipHero page. If you go to the navigation bar, you will see there is a user enroll icon here. (02:24): This is useful in case you accidentally click off of this page. You don't have to go all the way back. You can access this from this navigation bar as well. So let's take a look at what you can see and do from the user page. So as a manager in ShipHero, you're going to need to be able to edit user settings, create new users, assign roles to users. How ShipHero works is your user will have a role. The roles are assigned certain permissions, so the permissions from that user depends on their role. Multiple users can be assigned to a single role. For example, you can have a supervisor and have multiple users that are assigned to supervisor level. They will all have those same permissions. A user can also have multiple roles. That's okay, but a thing to sort of note about that is if one role has more permissions than the other, it will default to the one with more. (03:28): For example, if you have a supervisor, they're allowed to access the order page, but a junior cannot, you've made them both a supervisor and a junior. Probably not the best example, but it could happen. They will be able to access it because they also have that other role. So just something to sort of keep in mind and we'll take a look at this. From this page, just a quick overview, you're able to modify the columns that you view here as well as from the filters. If you don't want to see the inactive users, you can filter them out. Another important function here is, "Okay, you said I can edit settings. How do I do that?" Well, when you click on the bold part of the name, it won't work if you click on other sections, but if you click over the bold name, it will bring up these user settings. (04:20): From here you'll be able to modify different settings, allow warehouses, if you need to change their password, anything of that can be done here. You can also see what role they are assigned. You can remove them from that role as well as add them to a different role all from this page. Now you may be thinking, "All right cool, but can anyone do this because that's a lot. You're telling me anyone can go in here and change a password?" Well no. That's where the permissions come in. You will need user permissions to be able to do these functions. We also have something called an admin, which gives you even more permissions. So admin, what you'll see here, so we like to call it like a super role. If someone has this admin toggle on, they have full permissions across the app. By default, your first user, the user that was signed up when your ShipHero account was created is your first admin. (05:27): But an admin can create additional admins. The thing to note, anyone that's an admin has full privileges. A big thing with this role is this is the only one that can modify existing roles and create new roles. You must be an admin to do those tasks. Reason being is we don't want someone giving themselves more permissions when they shouldn't be able to do that. So that is the point of this admin. It is separate than any other role. (05:59): Now you can create a new user like a manager that is not an admin, can create a new user with just user permissions. But if they wanted to create a new role, you'd have to be an admin. We have some help docs going over this in a bit more detail, but I definitely wanted to point that out because you may have saw this toggle here and was like, "What is that?" So this is your user's page. From this page you can also do some other functions such as clearing order locks, and then if you needed to make a user active or inactive when you log in, you can click this toggle to activate it, hit save, and then you'll see it's now active and then my total user count up on top is increased. All right, so from here I think it's best to kind of jump in, let's create a user, let's create a role and just see how that whole flow works. Sound good Danno? Danno (06:59): Sounds good. Please. Val (07:01): Awesome. So creating a user, very simple. You go to the top right hand here, click this button. Now you're going to be filling out some details. So all right, Danno, you are our test here. Going to do... I think I'm up to a very high number now and then we'll get you a password. That's a good super secret password that no one will ever guess. All right, you can see I can activate it here. I can't make them an admin yet. If I wanted to make Danno an admin, we would have to do that later. I am currently an admin. I have those privileges, but that is something to note. If I was not an admin, I would not be able to make him an admin. The different settings you have, you can set default print stations, a default warehouse if your account has multiple warehouses. You're also able to limit view to certain allowed warehouses, either/other settings. (08:05): You don't need to set these if they don't apply to this specific user, you can simply hit continue and then you'll have some more settings. Again, these may or may not apply to the specific user, but these are things like Tote QA, which requires additional scanning, just how things are going to display on this user specific mobile app if you want. Voice picking, as you'll see when you select this, it gives you additional options. Just select the speed. Similarly, if you want some sort of sound feedback, which is on the mobile, this is where you would do that. Then you just hit continue and now you have an option to assign a role. So you can assign this user to an existing role, but if it is a new position, maybe forgot to make the role, that's fine. You can simply click here and create a role. (09:00): Now this will look the same here as it will if we go to the other create a roll page. So I'm going to just show us how to create a role now, but it's the same on the other page. From here you'll have an option to either have a completely blank set of permissions or you can choose an existing role and kind of use that as a template. I think this is very useful if you say have a role picker and maybe you want entry level pickers, so it's essentially the same but you want to remove some permissions. This is a good way of doing that quickly, but if it's something entirely new, you can keep it blank. In this case, I actually don't have the picker as a... which is kind of interesting. So we're going to do this, but let's make a picker role. Danno, you're going to be a picker. Danno, you were recently picking at the warehouse, right? Danno (09:53): That is correct. Val (09:54): Danno's having lot of fun with that. Yes. So pickers generally don't have access to billing. They might need to see their bins, different devices, locations. I'm actually giving you more privileges and I think a general picker would have, but it's okay. We trust you. I'm going to do this. Product permissions, a thing to note about some of these permissions, things like this, which involve inventory transferring, which is a mobile function, this permission applies across the platform. So if you're trying to change inventory on the desktop, these permissions apply. If you're doing a movement through the mobile app, like a picker would have access to these permissions would apply. So it's a good thing to keep note when you're assigning these permissions, we trust you but you're not touching purchase orders. So we're going to take those away and you just go through your different settings and then you hit create role. Here's our new picker role and we will assign Danno to that one. (11:05): And there you go. New user has been created, assigned to a picker. You may notice this notification up here, your plan has reached its user limit. This depends on your specific account. If you need to add more users, you would simply click here and it will forward you to yet another page where you can adjust that. But this is a warning just to let you know you have maxed out your users. So 10 I guess was my limit. That's the process for creating a user and a role. (11:36): If you just wanted to create a role, you can do though from here. When you hit create role, it brings you to a page that looks very similar to the one we were just looking at. The same idea. You can choose your template as you can see it filled in what we just created. And then you can make another role here. If you are an admin and you have the privileges to do so, from this page, you will be able to go into a role and modify it. If you were like, "Ah, do you know what our pickers really do need to do..." I don't know, billing. You can go in and hit save and add that permission. And then you can also see who is already assigned to this role as well as add users from here as well. So you have options to do it from either page. (12:32): And this is really an overview of the users and the roles. We do have help docs, knowledge-based articles that have this in a bit more detail that will walk you through each of these steps. But we wanted to put something together to just give an overview of these pages. So hopefully this helps with that a bit. Danno (12:56): Yeah, absolutely. And it's super intuitive. Val (12:59): Yeah, it's pretty straightforward. Danno (13:01): Exactly. Okay, thank you very much Val. And if you'd like to check out other feature walkthroughs, click on the top right corner right now and if you're ready to unlock your e-commerce fulfillment superpowers, visit shiphero.com to schedule a call with us. Thank you for watching and have a great day. Val (13:17): Thank you.
Do you ever wonder how it all works? Warehouse Management Software is a three-word term for making it easier for eCommerce brands to manage their warehouses and ship to their customers. Check out how ShipHero does it with this quick breakdown of our legacy WMS.
Shipping eCommerce is hard. ShipHero makes it easy. Is your warehouse out of control? Does shipping feel like a never-ending job? With ShipHero’s WMS, you can manage your inventory and your shipping from one easy-to-use interface. And, it’s easy. Step 1, connect your store in a snap. Just a few clicks and you’re ready to start. Step 2, start receiving your products, entering them into inventory and getting them ready to pick. Step 3, automation rules in ShipHero signal your Warehouse team to add special touches that customers love. Add a free gift, include personalization or set a special status. Step 4, as those orders come in, start picking and packing. Single and multi-item batching makes it quicker to pick orders. And cuts down on mis-picks. Step 5, now it’s time to pack! Automation rules can also dictate box sizes, marketing inserts and shipping options with no on-the-spot problem-solving from your warehouse team. Stop for a pic. Take a picture of the package before it’s shipped. ParcelView is ShipHero’s tool that lets you know you shipped the right item in the best shape. It’s time to recognize your heroes! The Heroboard is a great tool for your warehouse team - it displays the pickers and packers on duty and ranks them based on performance. A little friendly competition never hurt anyone. If you want even more visibility into the shipping process check out PostHero! PostHero is a powerful dashboard that showcases the fulfillment process and allows you to track packages across carriers and identify and address fulfillment gaps and opportunities. All of this technology leads to the best possible outcome - getting your customers their orders accurately and on time. It all starts with ShipHero. To find out more about how our Warehouse Management Software can save your warehouse time and money, visit our website and schedule a call with one of our software sales experts. Let’s Get Shipping!
DFTBA (Don’t Forget to be Awesome), a retail merchandise eCommerce website that features products from digital creators, had hit a wall with their prior shipping solution, ShipStation in 2020. With monthly orders ballooning to over 56,000, ShipStation was no longer able to keep up with their demand, creating bottlenecks that prevented orders from going out on time and killing their efficiency.
Enter ShipHero. With our powerful warehouse software, ShipHero offered DFTBA the ability to scale at the rate of their skyrocketing growth, simplify their operations and maximize their efficiency.
Everyone wants to be a hero! In this video, Yosef and Danno introduce ShipHero’s Hero Board feature.
0:06 Hello everyone and welcome to another episode of ShipHero feature walkthroughs. As usual, I'm joined by Yosef, our ShipHero VP of Product. How are you today, Yosef? 0:14 I'm great. How are you doing? 0:18 I'm good. I'm happy to have you here. So today, Yosef will walk us through an amazing ShipHero feature: the Hero Board. Is that so? 0:26 Absolutely! Everyone wants to be a hero, so this is your chance. 0:30 That's right. Okay, tell us all about it. What is the Hero Board 0:36 So the Hero Board is a way for you to get an overview of what's going on in the warehouse. So, how many orders need to ship, how many orders have shipped today, and in addition, the individual employees - the pickers and packers in the warehouse - what their performance has been for the day. And we've seen a lot of customers put this up on a big screen, put it up in the warehouse, make it visible to everyone. Not only so they can see what the status is and how many orders they have to still ship, but it does create kind of a little bit of a competition, so good healthy competition between the pickers or packers. You know, who could take the number one slot on the Hero Board. 1:19 What you see here is kind of the overview, and I got to this just by going to my shipping. And on the left side, you have your Hero Board, and this shows you kind of the overview of the warehouse. A few things you can note: you can filter this by warehouse, so you can just choose different warehouse if you have multiple warehouses. If you're a 3PL, you can focus by customer status, and then there's a few more filters you can use as well to really dial in what you want to see. Below is a breakdown of each status in that warehouse, so you can see, for example, the first status, how many orders are pending, how many are currently in a tote, how many are locked, which means they're being worked on at the moment. That does it by status. On top, you have the overview, the summary, so how many orders ready to ship, how many orders are currently in the tote or locked, and how many of them are due today, and that's based on the required ship date. 2:11 You also have full-screen mode, so full-screen as it implies will just kind of take away all the menus and your toolbar things like that and give you just that view of the Hero Board. So if you are putting it up in the warehouse on a big screen, you can just see that in front of you nice and big. We also have here a report export, so you can click on that, pick your packet performance, and this will export performance for your individual pickers or packers. You can choose which one you want to see, where the date range is, and the warehouse you want to export it for. Now, if you want to see that information live, you can click on this view live shipping board. This brings you by default to your packer board. Again, you have a lot of filters here on top so you can look at a specific warehouse, you can decide you want to look at orders or items. So orders will be, in this case, 7,400 around and 107,000 items to meet the ship, I guess there's some big orders there. So next, you can say your time range, and this is your working hours, so you can see below that we have this graph of, you know, how many orders were packed throughout the day, and that starts at 7 and ends at 7. So depending on how many hours you're working or what your shifts are, you can set that to adjust for the working hours that you have. 3:27 If you're a 3PL, you can also flip this by customer, ship by date again, any date should be the due date or orders that are late. So you can see how many orders that ship today that were late. And then users as well, which we'll look at at the moment as far as the information that you see, how many orders you have left, and it does estimate how many per packer based on how many packers you have. And again, that graph showing you throughout the day how many orders you packed at given times and again how many you have to pack per hour to meet the goal. So there's about two hours left. We're doing this around 5 p.m. So we have until around 7 p.m. And if we're going to ship 7,300 orders, we got a lot of work to do. So, all right, give you a good overview of how many orders you have left to pack and how many you need to pack per hour to make that goal. And then you have the breakdown of the individual packers. You see the packer, we give a little award here, so you have your gold medal, your silver, and your bronze medal, one, two, and three. And that's just based on how many orders they packed throughout the day. So this first packer, you can see at 9 a.m. when they got in, they started packing almost 350 orders at first hour. And you can see throughout the day how many orders they pack and then the total and an average per hour. So this person's packing about 187 orders per hour. And you can see, you know, again for each one of your packers all that information. Below that, again, a summary of how many orders were shipped today, how many were late, I'm gonna redo today, how many are remaining, so the same information you have on top, again broken down by late and due today as well, how many orders you have in totes, so basically how many orders are currently being picked, and locked would be how many are currently being worked on, so basically there's about 200 orders that are in the process of being shipped as we speak. 5:16 Now, this is the packer information, you can also go to your users and switch to pickers. You can select specific users here if you just want to see certain users, but I can hit apply by picker is that you notice that the color changes a little bit, a little different shade of blue and that tells us that we're on the picker board, so it's the same information but it's for your pickers and not for your packers, so it's how many orders you're picking per hour, how many orders they need to pick, instead of pack, but again it's the same information broken down by by picker, and then you know how many they did per hour and the average that they picked per hour. So again, this board is your live board if you want to export, you know, historical information, basically that information historically, you can go to exports, choose what you want to export, and then your date range, you'll be able to export it. So, again, this is something that a lot of people have had asked for. We had some dashboard previously, but this gives you a lot more information. You could be a lot more granular about what you want to see, and again it is kind of optimized for that big screen so you can put that up and you don't have people you where all see it, see it easily. 6:28 Yeah, yeah, it's great. Okay, thank you very much, Yosef. 6:33 My pleasure, and if you'd like to check out other feature walkthroughs, click on the top right corner right now. And if you're ready to unlock your eCommerce fulfillment superpowers, visit ShipHero.com to schedule a call with us. Thank you very much for watching and have a great day. [Music]

In this video, Yosef and John introduce ShipHero’s new and improved CSV Order Upload feature. In the demonstration, Yosef shows how to upload a CSV order document, how to correct any mapping errors without re-uploading a whole document, how to review and finalize output, and how to use the intuitive interface to view and manage order information.
0:00 Yosef: How are you doing today? John: I'm good. 0:02 John: How are you? 0:04 Yosef: Good. It's Thursday, which means we were supposed to record a video. Do you want to? 0:06 John: Yes, apparently. Well, we're here anyway, so might as well. What do you think we should cover today? 0:09 Yosef: I was thinking one of the more exciting features in ShipHero, everybody's favorite CSV order upload. 0:17 John: Oh man, I don't know if I'm ready for that. 0:19 Yosef: Yeah, it's pretty intense. 0:23 John: Sure, let's do it. You want to show your screen? 0:31 Yosef: Yeah, let me get that screenshot started. So, for anybody currently using ShipHero, this may be a little bit of a new screen for you. We do currently have CSV order upload available, kind of an older version, missing some really nice features that we built, namely error checking, kind of that status, like knowing uploaded a file, how many orders have been uploaded, where are these orders. So, we added some of those features. We also added some more intelligent mapping so you can basically upload a file, we'll try to match the names of your columns with the names that we need, the columns that we need, and match those automatically. And then we'll see, there's a nice interface for creating those mappings as well. 1:17 Yosef: Basically, the flow is pretty much the same as what was before. You start with uploading and then you do the mapping. So, we'll jump into it by first of all downloading the template. 1:26 John: Did we make it more beautiful or do we make it more functional? 1:34 Yosef: A little bit of each. So, it is nicer. You can now see the batches with the files that were uploaded. So, you have some more visibility to that, and then there is some more functionality as you'll see. 1:49 Yosef: We downloaded our template. We have all the columns here on top. You can see that actually in the column names, we put what's required so you can see the address is the required column. 2:31 Yosef: Basically, everything you'd expect in an order upload CSV. 2:47 John: Gotta love Excel. 2:53 Yosef: Now that we have our template ready, we can upload it. So, we'll upload orders and we'll choose our template or our file. And as you can see, we've automatically matched the fields in the template with the fields that we need in ShipHero. So, all these have been matched. That's because we used the ShipHero template so we know they're the exact same. 3:39 Yosef: So, completely, if you download the template like you just did, it automatically will map because we know those fields. 4:32 Yosef: So, if you upload a hundred... if you're doing an upload with a hundred and two of them failed with an error, you don't have to upload again. You can just do those two that were there, just those two. 5:12 Yosef: Yes, you won't have to upload all hundred again. You'll just be showing those orders that have failed. You can correct them, upload it again, and those two orders will be able. 5:54 John: We have an email notification for those too, right? 5:58 Yosef: Yeah, so there is an email. Once the batch is finished, you'll get an email. It'll tell you how many were created and how many errors there were. You could download the CSV with the errors from the email. 6:24 Yosef: Now, once you upload a file, you can then save that mapping. So, if I went through and created like a manual map, so I have my own custom file, I've mapped all the fields, you can click on this map and save as a template. 6:51 Yosef: Now that I've uploaded, you can see I have a couple of orders here that were uploaded. You can click on where it says orders and it'll take you to the manage orders page and show you just those orders. 8:31 John: Very cool. Well, thanks for joining us today and thank you also for taking us through CSV order upload. If you like this video, we'll do more. Hit the like or subscribe button. 8:51 Yosef: So, we've got to point up, I think, or down this way. You'll find like, subscribe, yeah, you'll find it and we'll do some more. Until next time, bye.